Add A Servo Motor To Your
Starting Gate
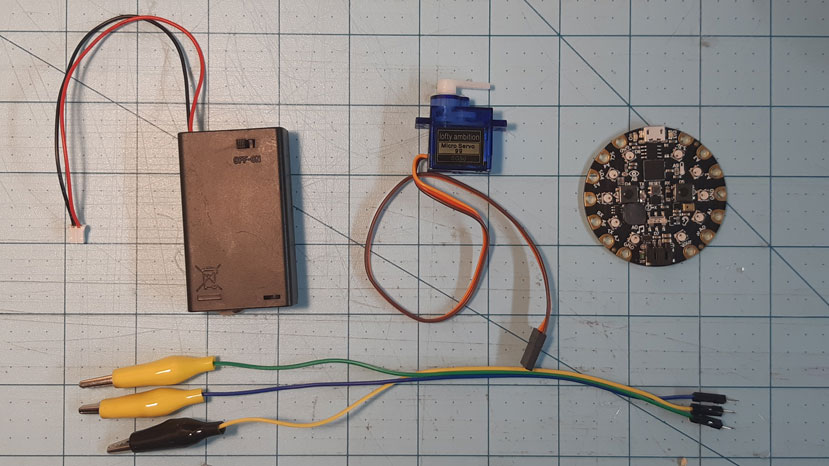
What You’ll Need
- Starting Gate Project
- Cardboard (corrugated)
- Circuit Playground Express Microcontroller
This project is for those of you who are looking to add electronics to their Marble Run, and may in fact already have a Circuit Playground at their disposal. This may be a bit more of advanced project for those interested
STEP 1
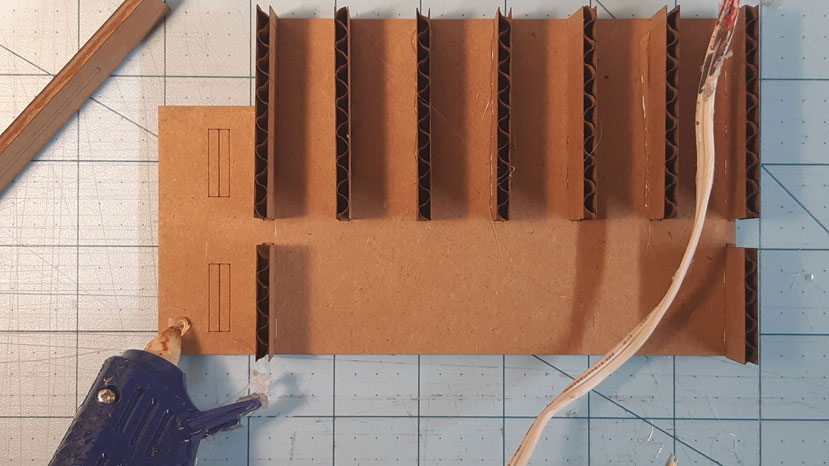
Follow along with our Starting Gate Project
Follow along with Steps 1 and 2 of our Starting Gate Project Guide

STEP 2
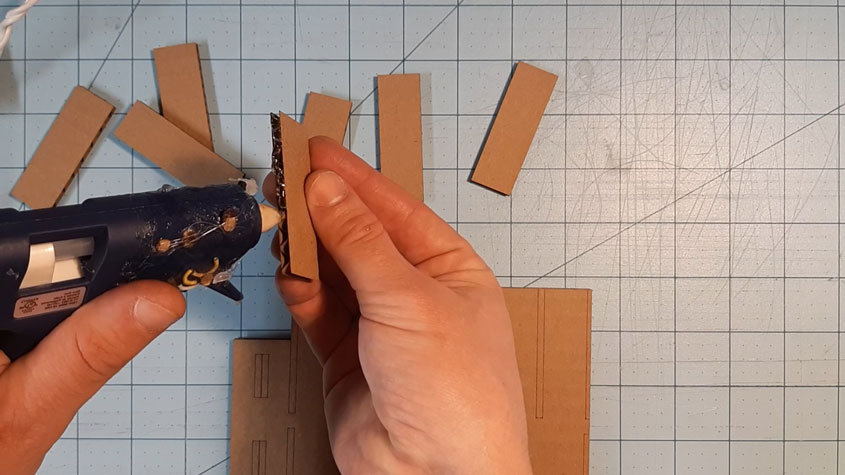
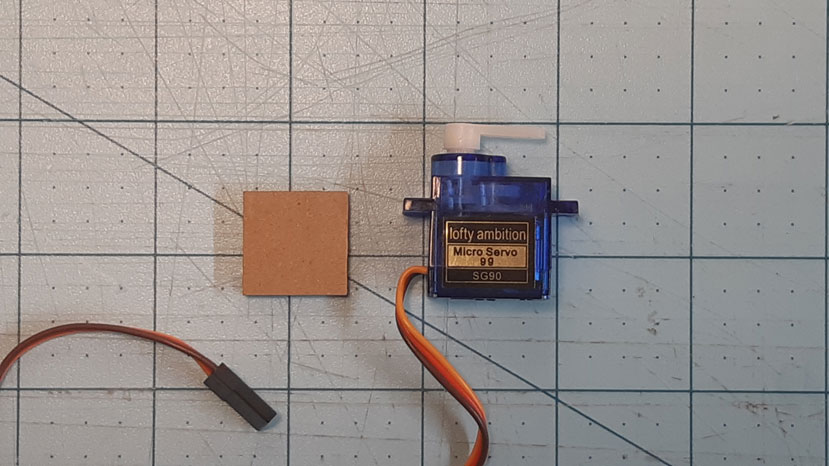
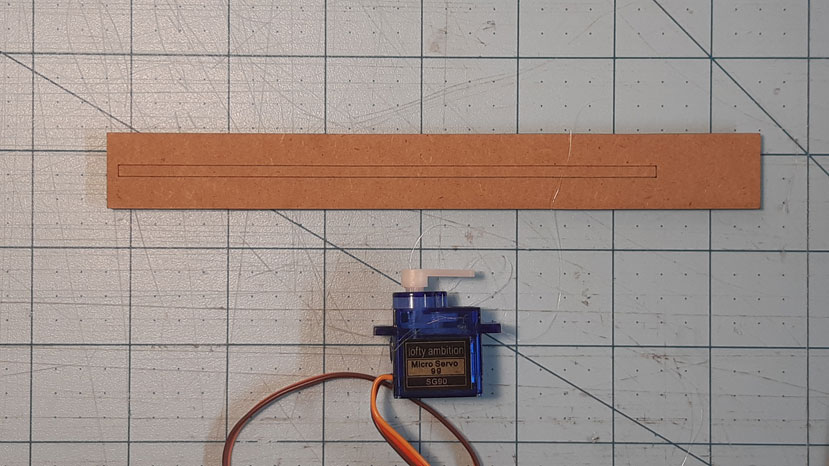
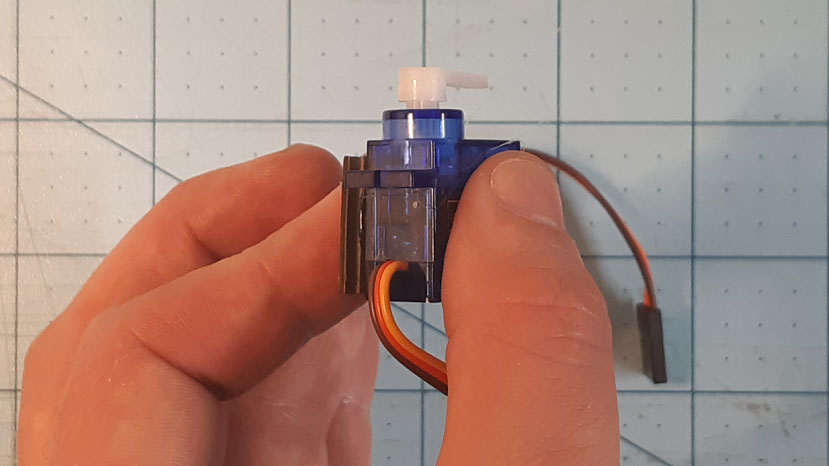
Servo Motor
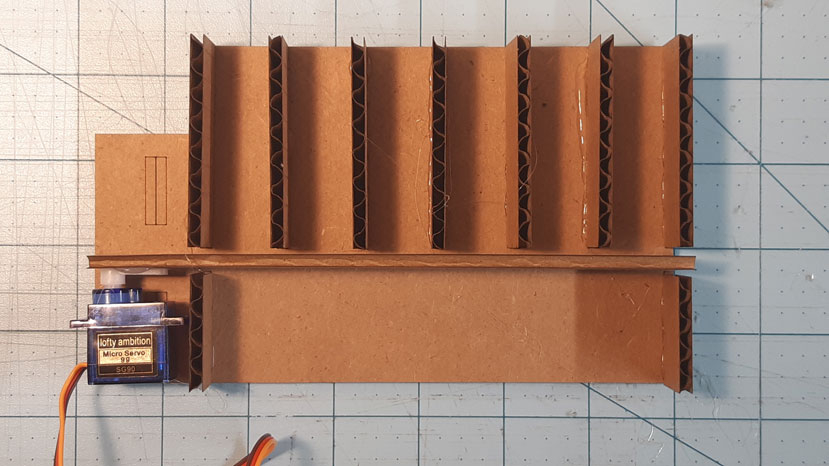
First align your servo motor to look like the picture (you may need to remove and reset your servo arm). Next, cut a square of cardboard 2mm by 2cm and glue this to the underside of the servo. When that is dry, add a small strip of hot glue to the middle section of the Gate A piece, and attach it to your servo motor. Be careful not to use too much glue, as it could get inside your servo and stick it up.
STEP 3
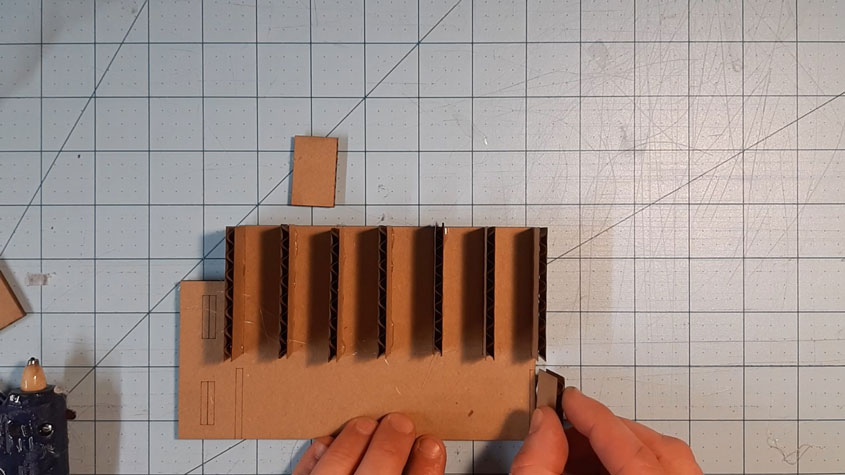
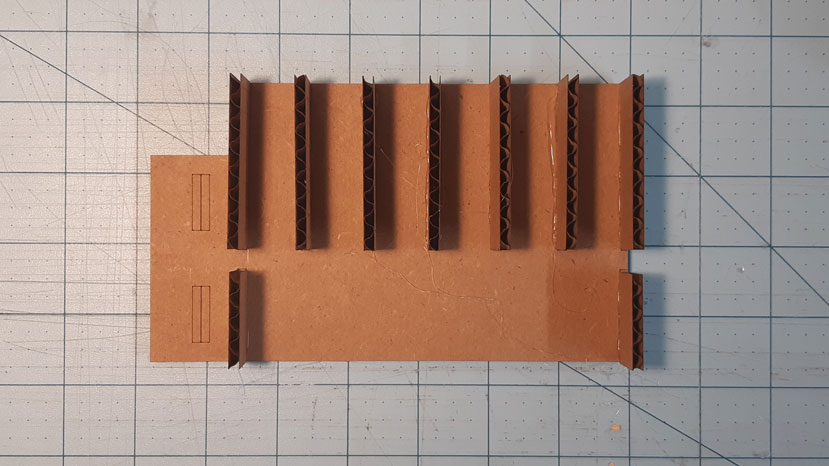
Attaching the Gate
Next, you will need to do a bit of aligning to make sure the gate fits into the slot between the walls. When you think you have it in a good position, glue it to the base
STEP 4
Hooking Up the Tech
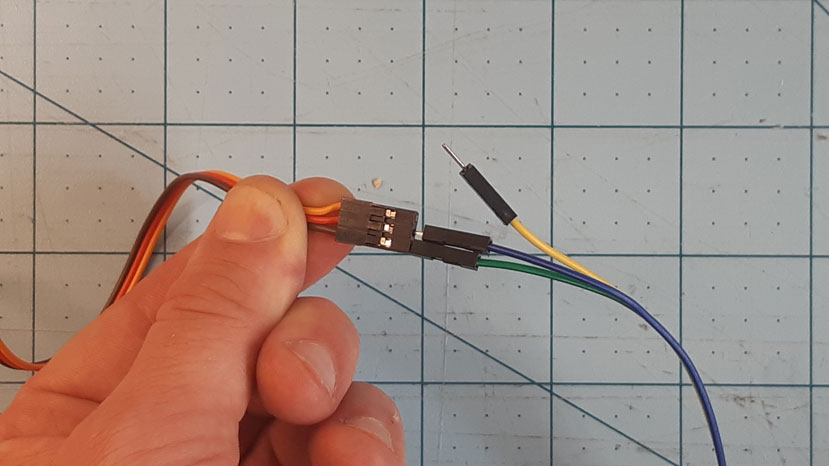
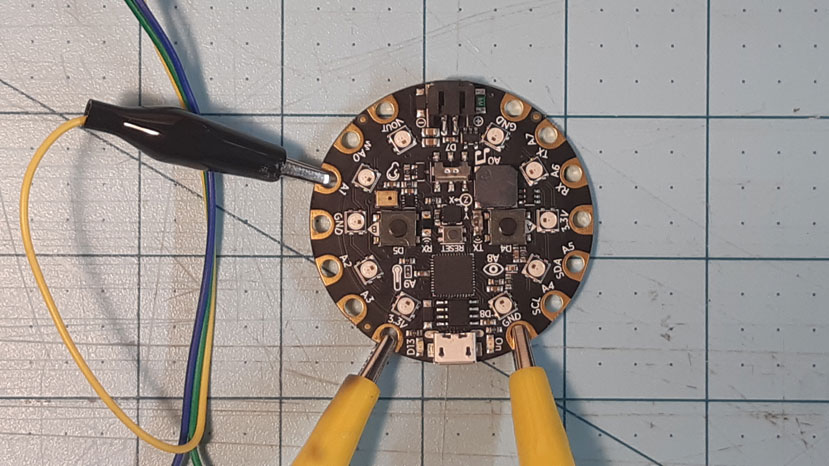
Now you will need to connect your Servo Motor to your Circuit Playground so you can code your CPX to ‘talk’ to your gate. First we need to attach the wire clips to the 3-wired adapter exiting the motor. The BROWN wire is the GROUND, the RED wire is the POSITIVE, and the ORANGE wire carries the SIGNAL. We need to connect these clips to the little copper rings on the outside of the Circuit Playground. The BROWN wire will connect to one that says GND (the ground), the RED to a circle that says 3.3V (the positive power), and the ORANGE to A1 (where we program the signal to connect)
STEP 5
Coding with MakeCode
MakeCode is a easy to learn block-based coding platform which is surprisingly intuitive to learn. It is a web-based coding platform, so you can access it and all your saved projects from anywhere; just visit https://makecode.adafruit.com/ to get started.
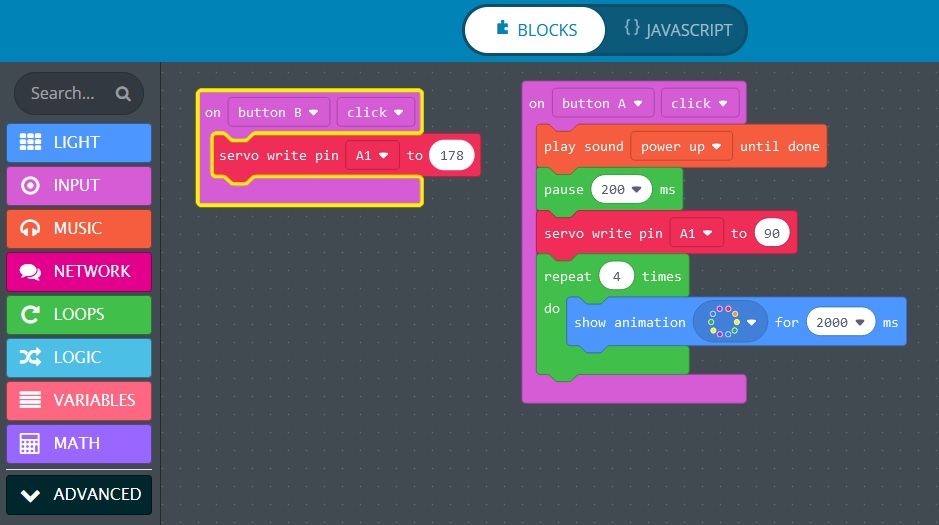
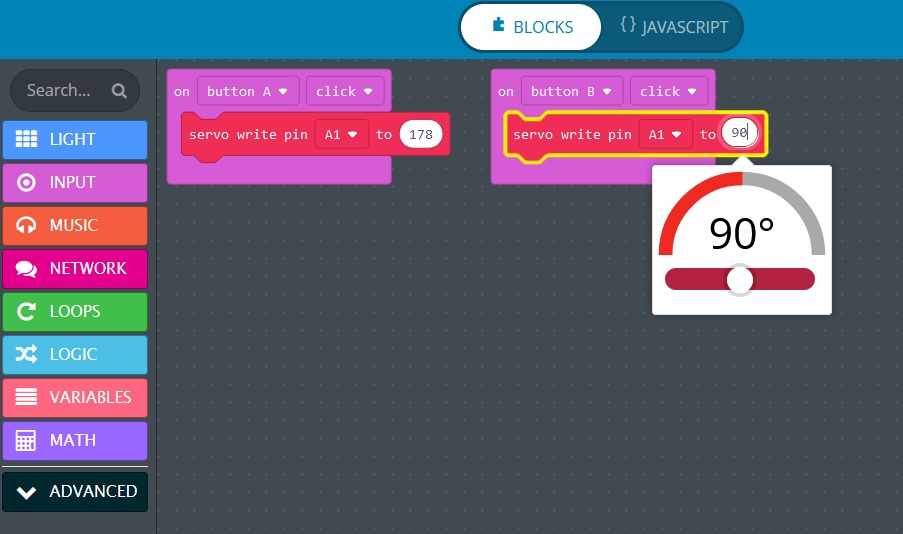
On the left I have included a photo of what your completed code may look like, but getting there is the fun part.

STEP 5 A
Setting Up A Button
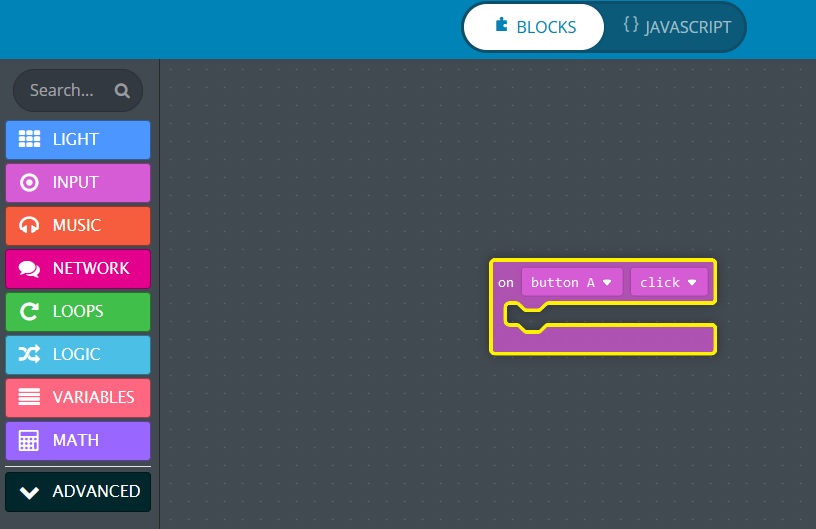
First, you need to select the INPUT tab, then click and drag the ‘On Button Click A’ module into the window.Next, we tell it to connect to our servo motor, by clicking on the ADVANCED tab near the bottom, and then the PINS tab.

STEP 5 B
Setting Up A Servo
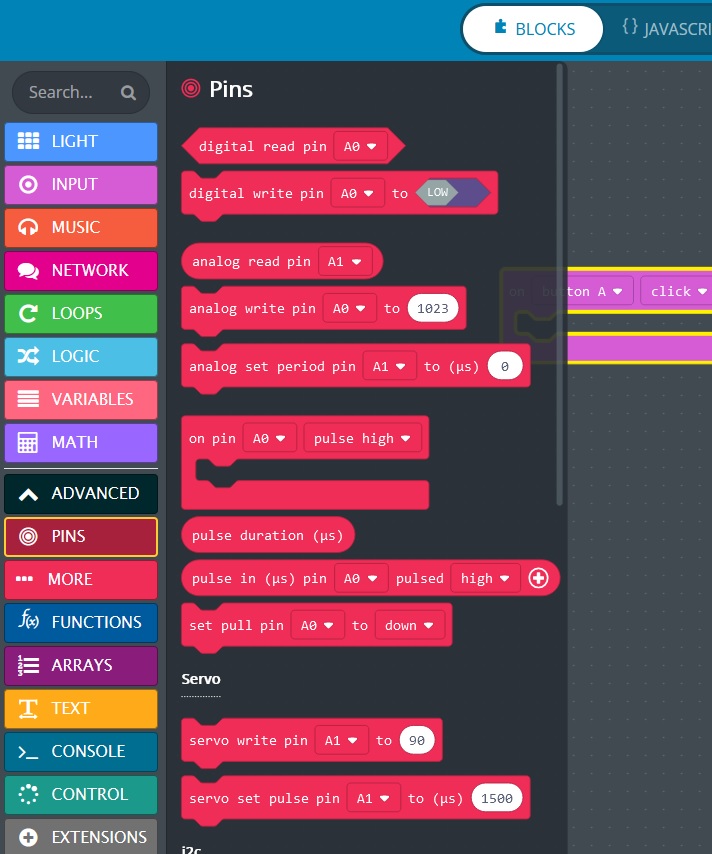
Next, we tell your Circuit Playground to connect to our servo motor by clicking on the ADVANCED tab near the bottom, and then the PINS tab. Scrolling down in this menu, you will see a command for Servos that says ‘Servo write pin A1 to…”. Drag that over to you Button A module and place it in the gap (mouth) of the code. You have now told your CPX that every time Button A is clicked, it will send a signal to the A1 circle, and that signal will move the servo to a certain position. But we need to change that number in the code to a ‘degree’. you can either set it manually or adjust the slider. The setting of 178 degress will set you gate down to a flat ‘closed’ starting position
STEP 5 C
Finishing Up
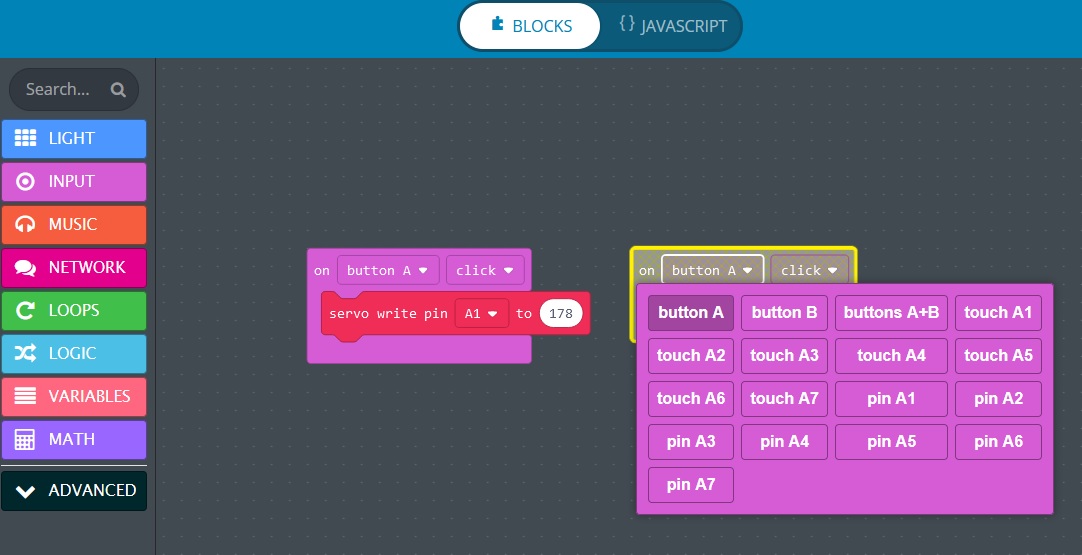
You want your Servo to do something other than just sit there though, so you need to set the other button to move the servo. If you just drag the Button command into the window though, it greys out. This is because you need to click the small triangle next to Button A, and change it to be another input (like the other Button). Now you just need to grab the servo controlling command again, but this time setting your number to something lover that 178 that will move your servo to a new position
And that is your basic gate code. If you wish to jazz it up a bit, such as adding lights or sounds, I suggest looking through the LIGHT or MUSIC menus to see if there are any interesting commands there. Can you make your gate light up as well? Can you make it open just to the sound of your voice?

STEP 6
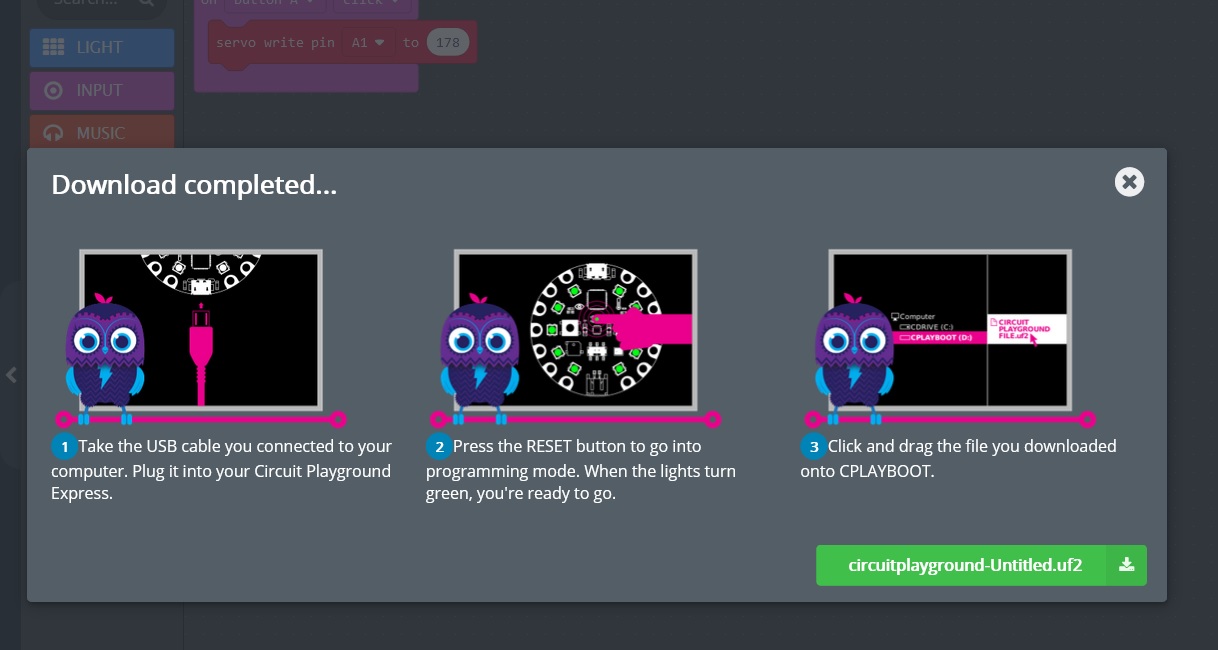
Download, Power On, and Have Fun
All you have to do now is save your code to the Circuit playground. Attach your CPX to your computer with a USB cable, and then hit the DOWNLOAD button in the lower left hand side of the screen and follow the instructions. After the lights flash and the download is complete, disconnect it from your computer and hook the battery pack to the appropriate connector. Your Starting Gate is now controlled by code that your wrote! Congratulations!