Build a Large Peg Board
What You’ll Need
- Peg Board Design Template
- Cardboard (corrugated)
- Wooden Dowel or Chopstick (about 6mm)
- Glue Gun and Glue Sticks
- Box Cutter or Sharp Scissors (and an adult’s help)
- Rubber Bands
STEP 1
Setting Up
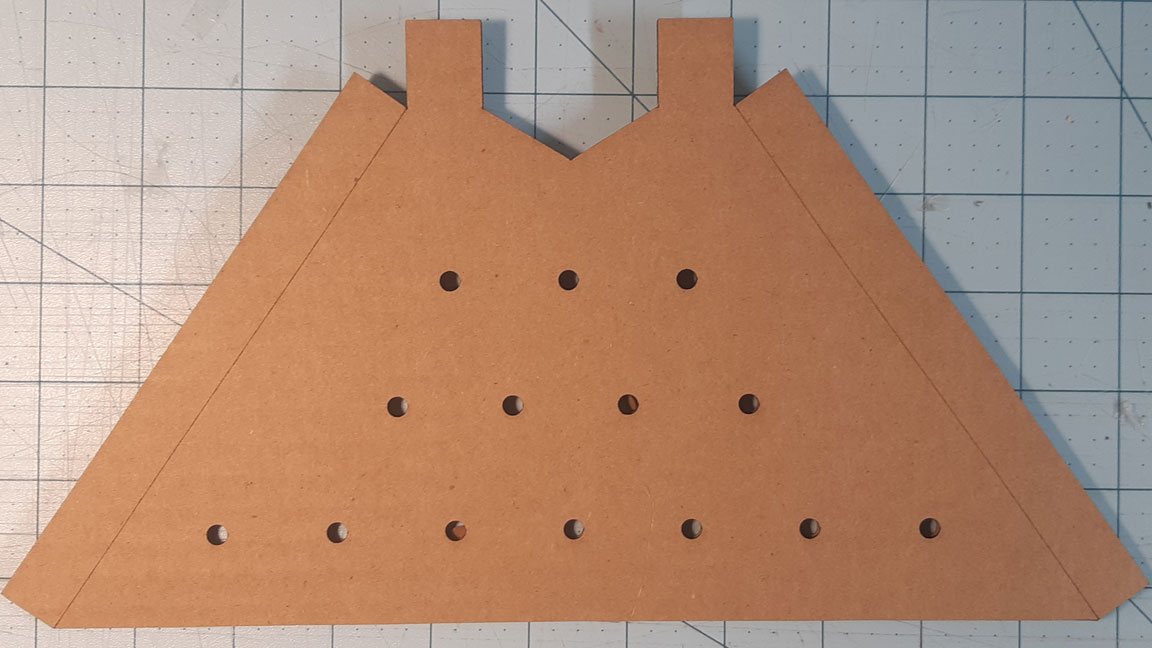
So this design is pretty big. It has been separated onto two sheets just so it could fit! if you have a piece of cardboard large enough, I recommend cutting out and gluing both sides to the same piece of cardboard and doing this as one piece, but we’re going to show you how to put it together as two separate piece for those who didn’t have enough big scraps lying around
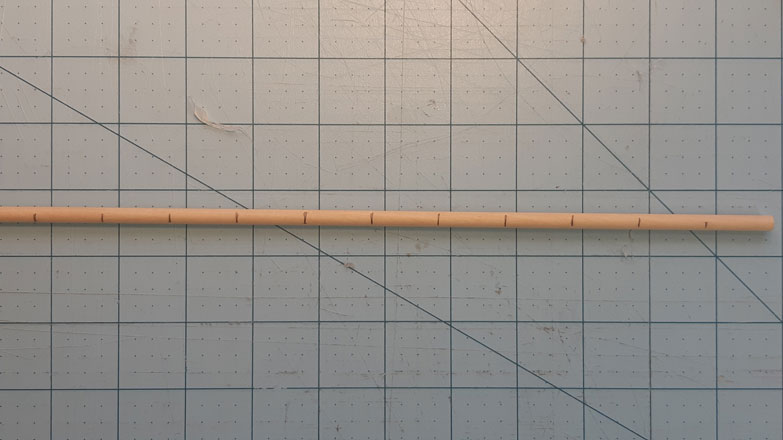
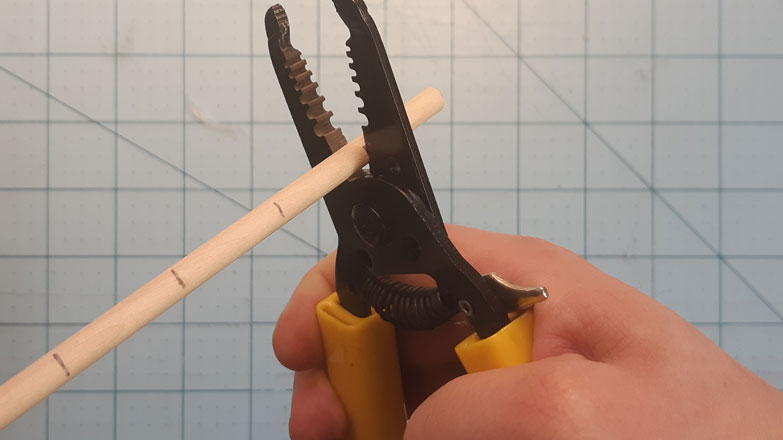
You’re also going to want to use the ruler on the design template to help you cut a dowel or chopstick down into 2.5 cm pieces. You’re going to need a lot this time – about 40! Make sure you get an adult’s help to cut them down to size

STEP 2 A
Building Side A
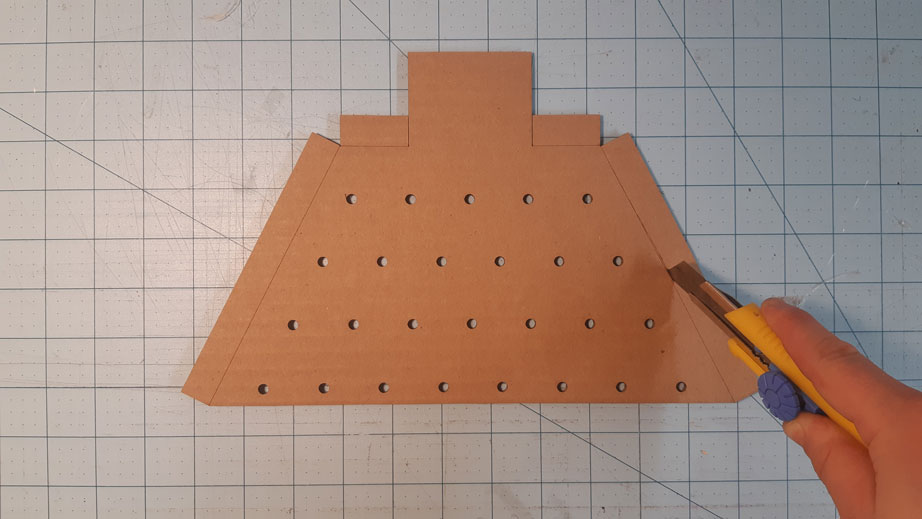
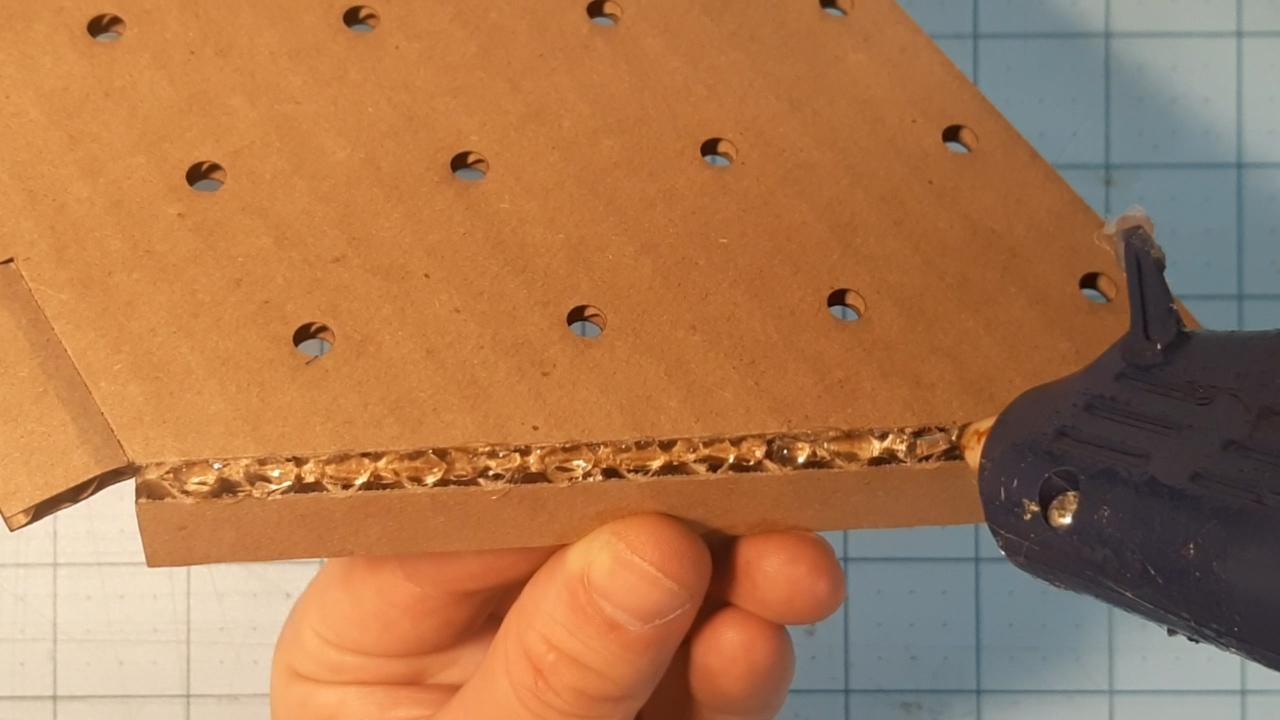
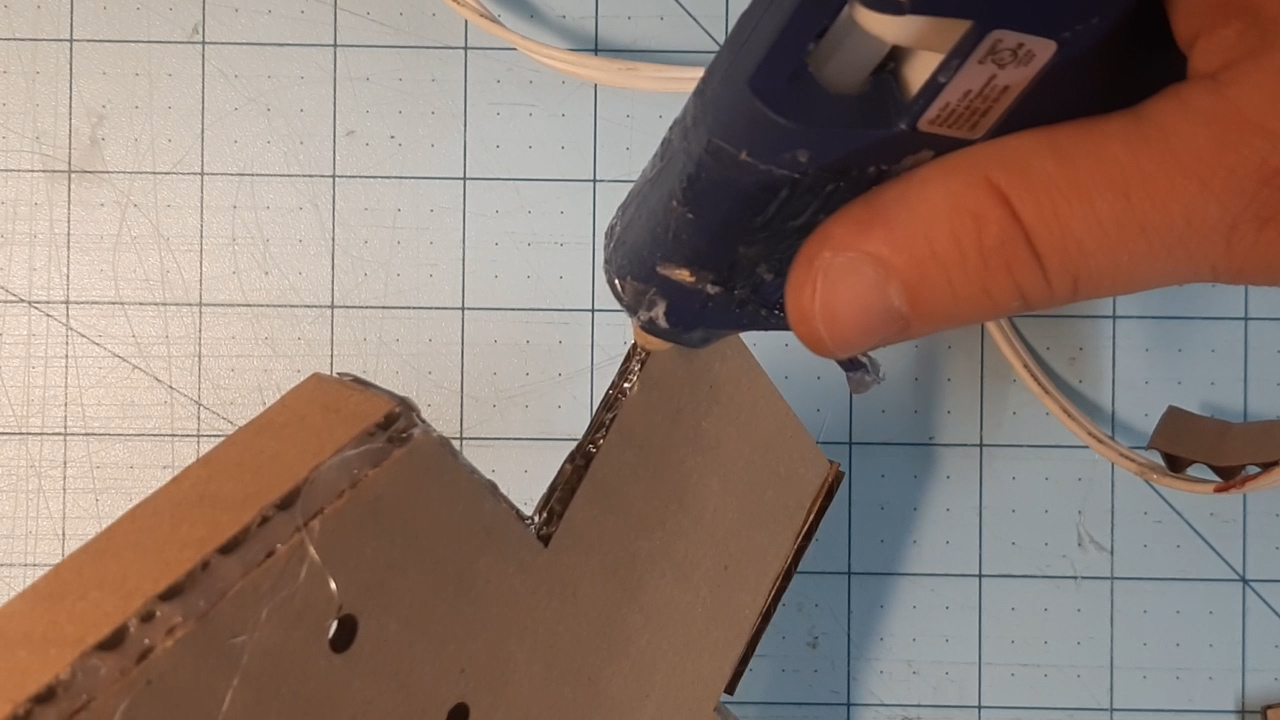
Starting with Side A, use a box cutter or sharp scissors (with an adult’s help), and lightly cut the cardboard along the dotted lines. You don’t want to cut all the way through to the other side, but just enough to allow the piece to bend. Add a bit off hot glue to the seam, and continue with all the folded sides.

STEP 2 B
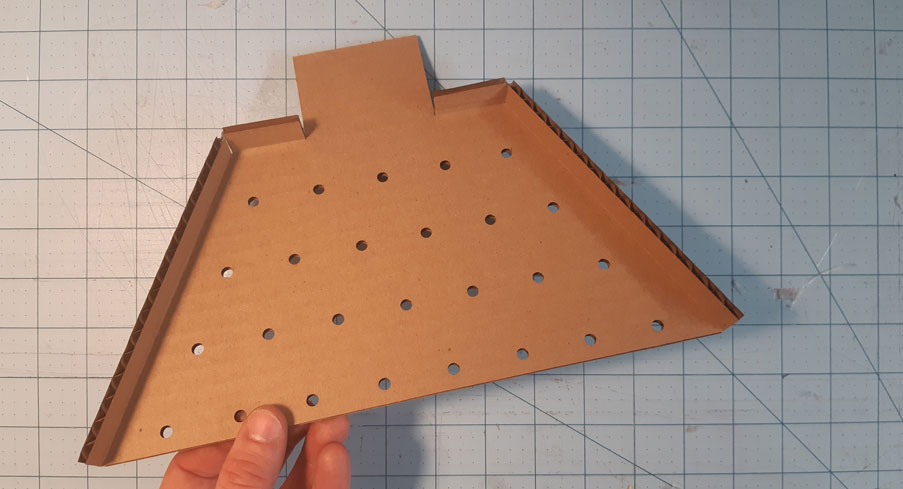
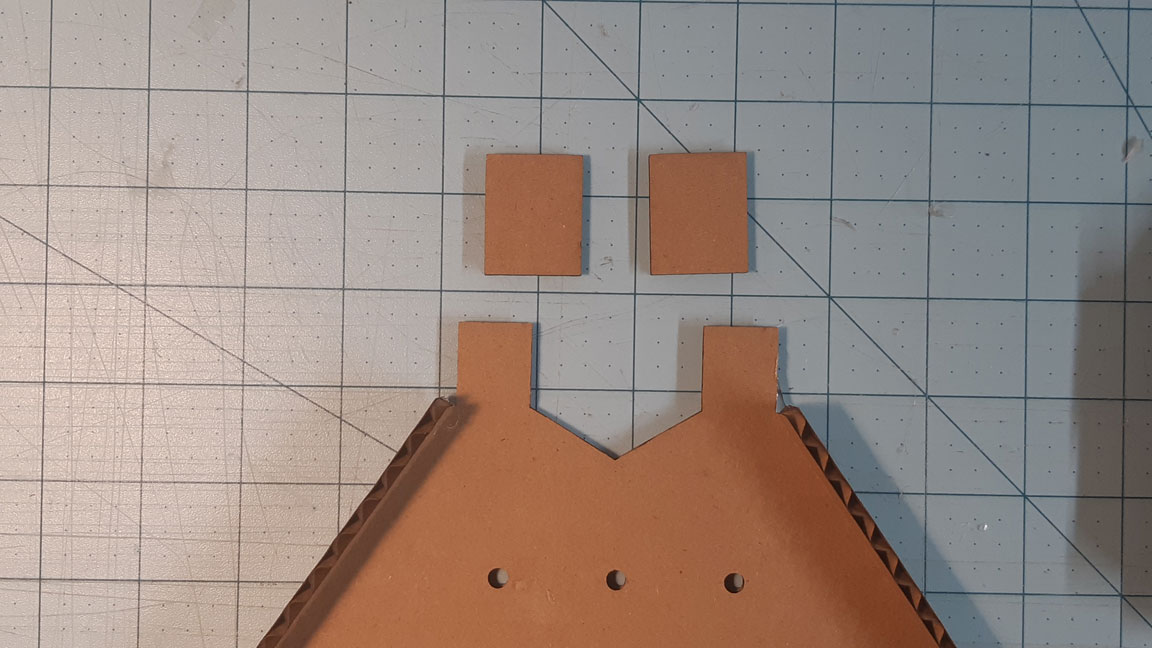
The next part of this step will be gluing on the Small Walls for side A – this is where Marbles will start their journey or fall into from some other platform. Starting with the two shorter walls, add a line of glue to the base and press and hold the walls on. The larger piece should fit snugly at the end

STEP 2 C
The Pegs
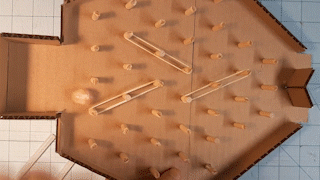
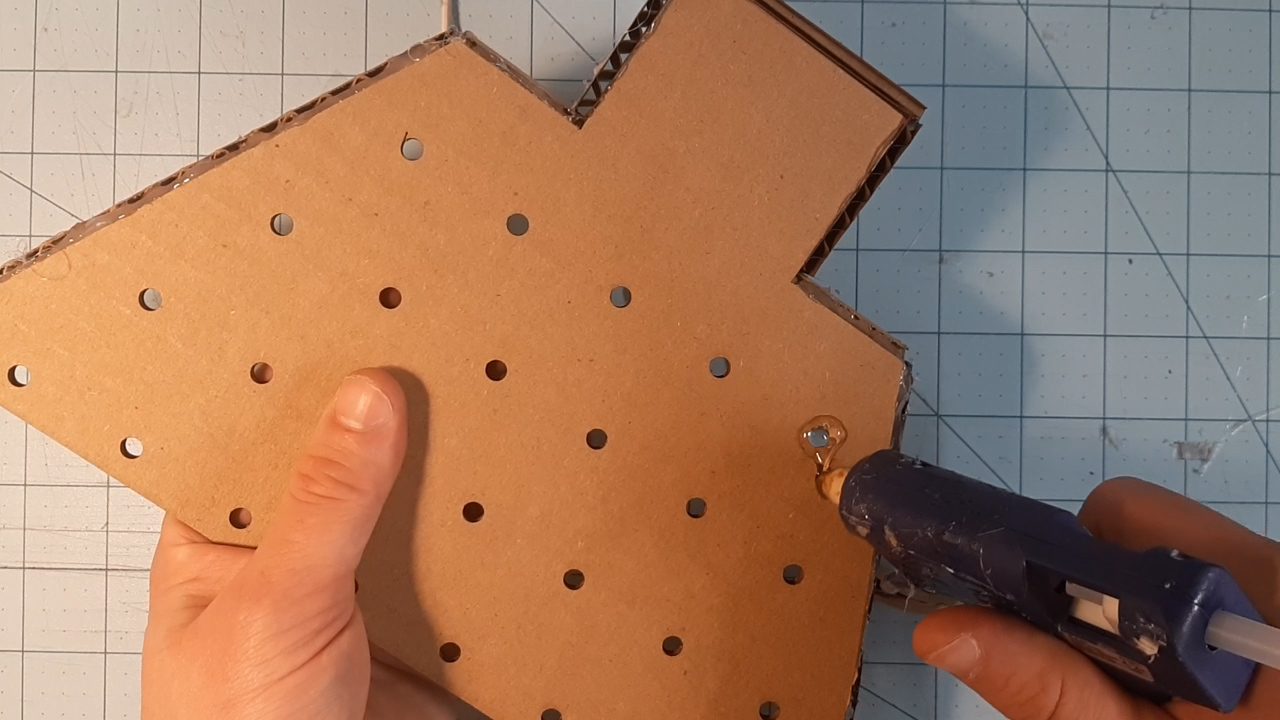
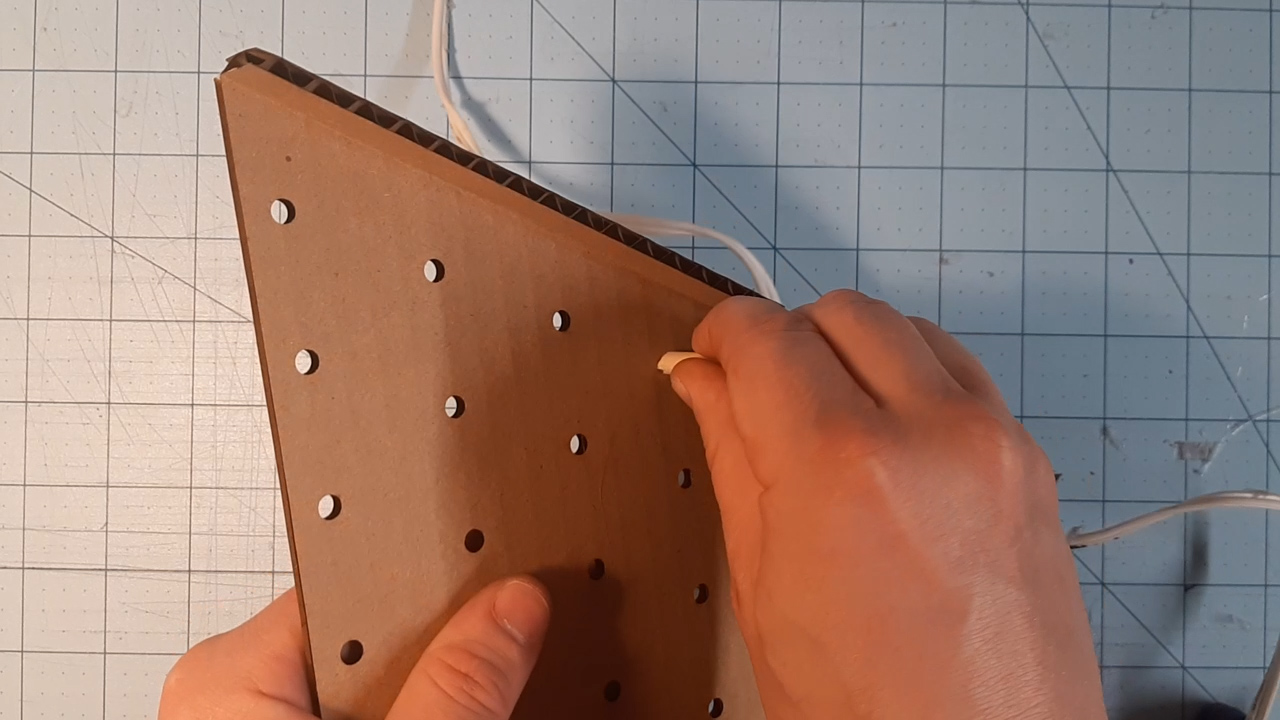
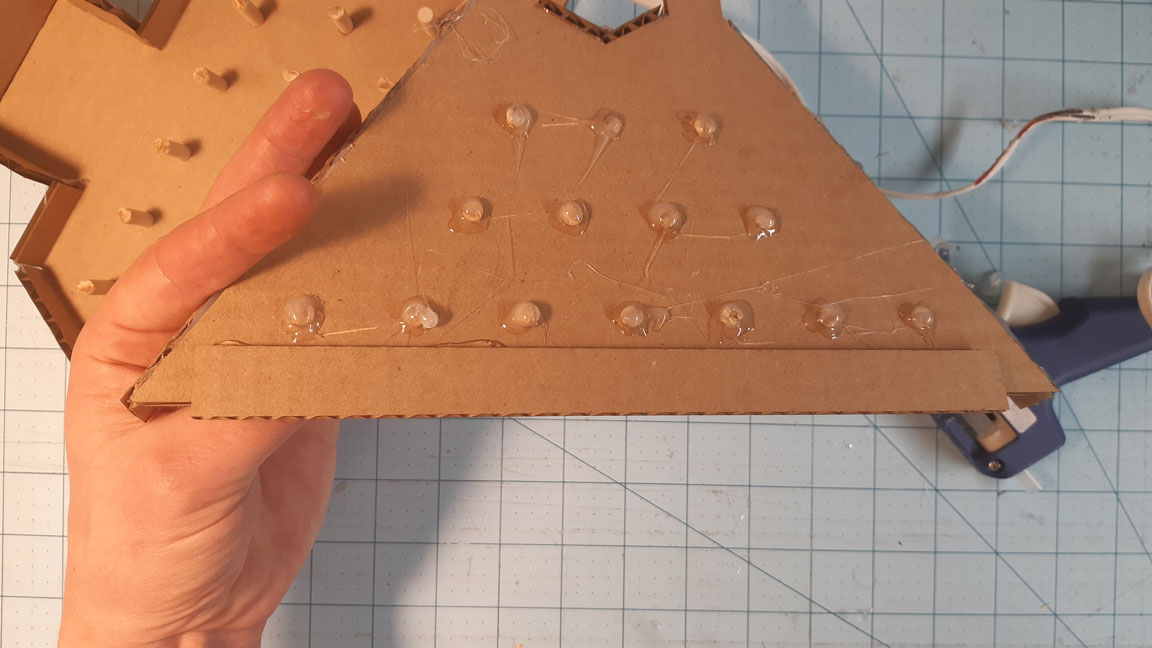
The final step for Side A will be to glue on the small wooden pieces we cut up at the beginning. The best way to do this would be to add a dab of hot glue into the hole from the bottom side of the cardboard. Then, push the peg into the hole from the top side until it just starts to break through the other side. This process will prevent globs of hot glue from sticking to the top side of your Peg Board ( and getting in the way of the marbles). Repeat this step until all the pegs have been placed; sometimes it is best to add some more hot glue on the bottom side for strength – these pegs will be taking some hits.


STEP 3
Building Side B
So now that you know the process for building one side, you’re going to do the same steps, only this time using the pieces from Side B. Your going to need to fold and glue your sides in place, add on the Small Walls near the bottom opening (see pictures), and then glue on all of your pegs.

STEP 4
Putting them together
The final step for this project is to simply attach the two sides together. Cut a strip of cardboard and glue it on the bottom of one side, leaving enough room to glue the rest to the other side. Reinforce this support with glue or tape if necessary.

And that’s it! You now have a neat Peg Board which will certain shake things up in your Marble Run! And as an addition to this, you can add rubber bands between the pegs to act as blockers and direct the marbles along any path you choose. Have fun! Be creative!